

With the coming of spring, comes the buzzing of the bees. Creating bumble bee rocks couldn't be easier when using this easy finger painted method. It's even suitable for little fingers, under supervision. After all, we don't want our little ones licking the paint, even if it is non-toxic.
Here's what you'll need:
- Your chosen rock
- Yellow acrylic paint - for the body
- Black acrylic paint - for the stripes on the body and dots for eyes
- White acrylic paint - for the wings
- An old plate, a paper plate or paint pallet
- Paint pens or Sharpies (optional)
- Black for the outline and eyes (optional)
- White for the eye highlights (optional)
- A slim paint brush
- Warm, soapy water
- A sponge
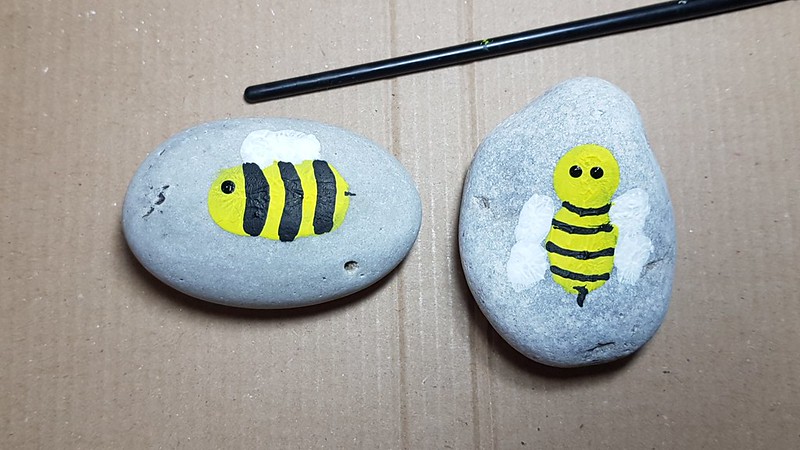
There are two bees here in different positions, front facing (right) and side facing (left). I have kept the rocks in the same position, when taking pictures, to make it easier to follow which bee you want to create. But why not create both?
Here's how it's done:
1. Wash and dry your rock. For more details on how to prepare your rock, click here.

2. Add a drop of each colour paint to your pallet.
3. Using your finger, dip it in the yellow paint. Always use the lightest first,
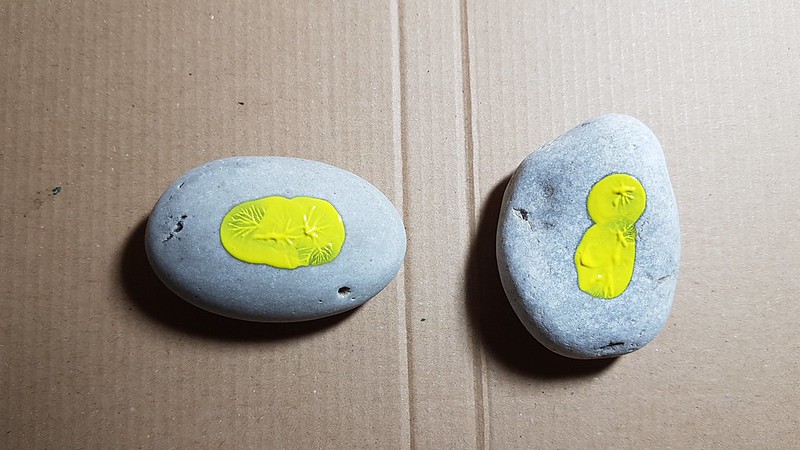
- For the side view bee, depending on the shape of your rock, ensure you dab in on the rock in a left to right position.
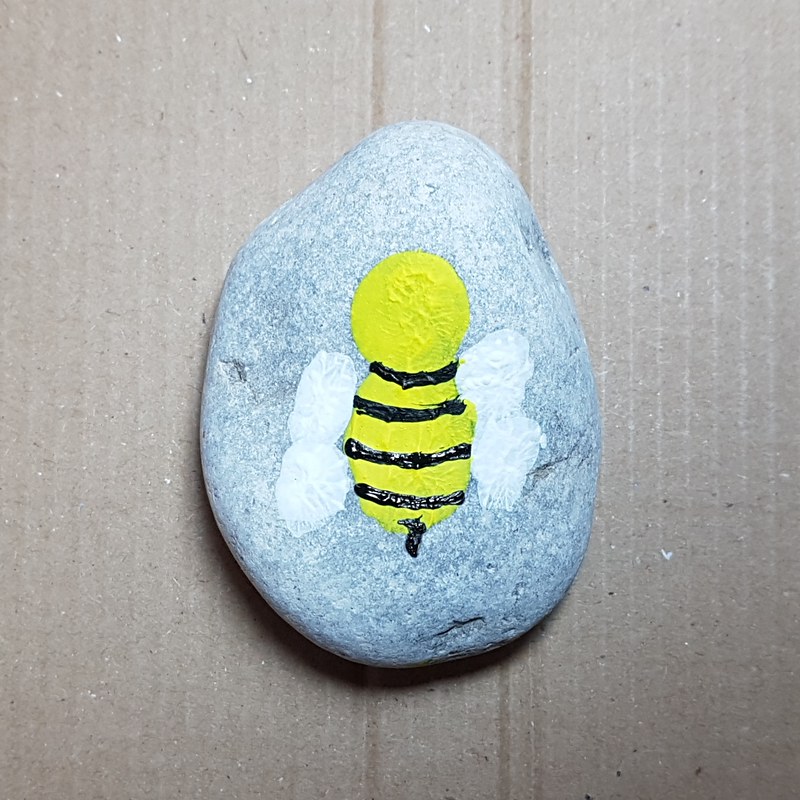
- For the front facing bee, dab it on your rocks in a top to bottom position, leaving enough room to add a second dab for the head.
Allow to dry and wash your hands
4. Add wings using white paint. Using just the tip of your finger, get ready to make smaller dabs for your bees wings.
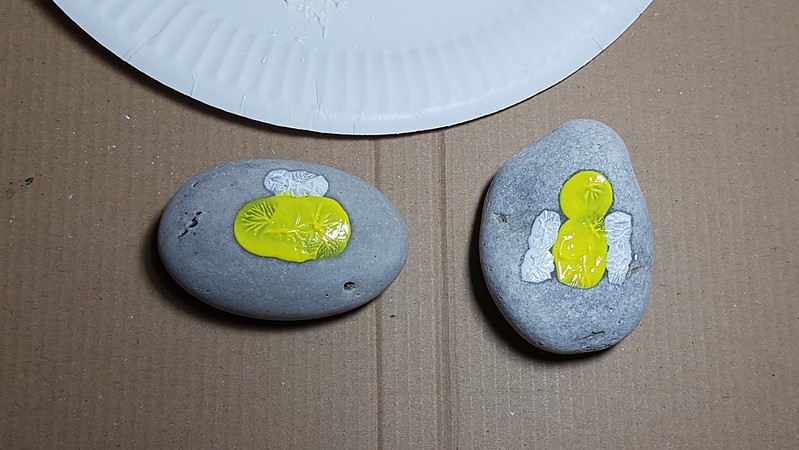
- For the side facing bee, add two dabs, pretty close together, on the top edge of your yellow dab.
- For the front facing bee, add two dabs, close together, on each side of your yellow dab.
Allow to dry and wash your hands
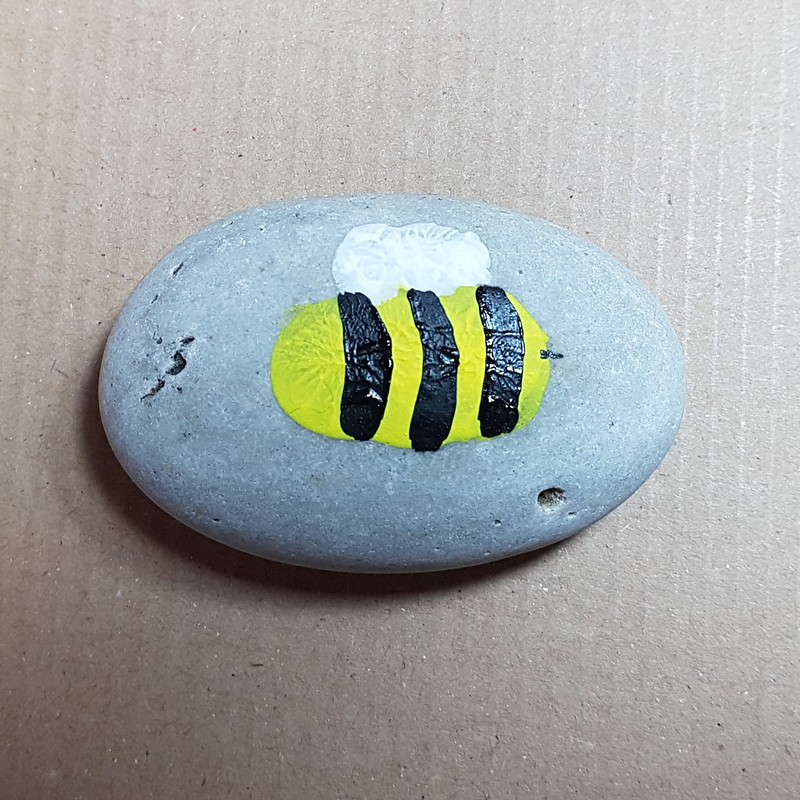
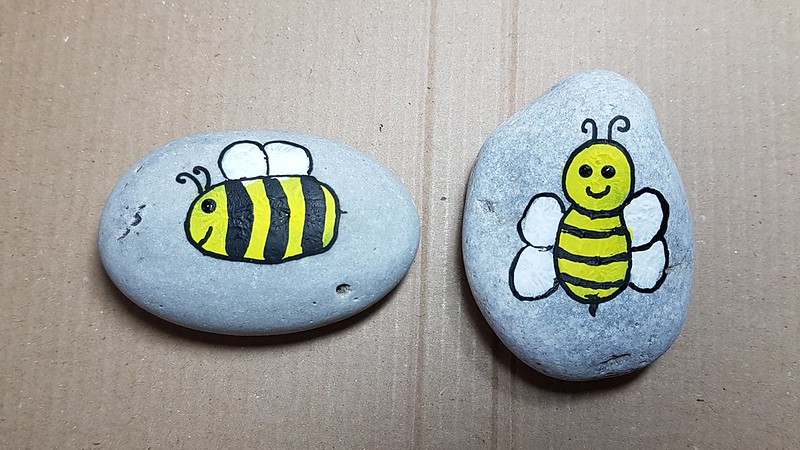
5. Start painting your stripes using black paint and a thin brush, or your paint pens and Sharpies
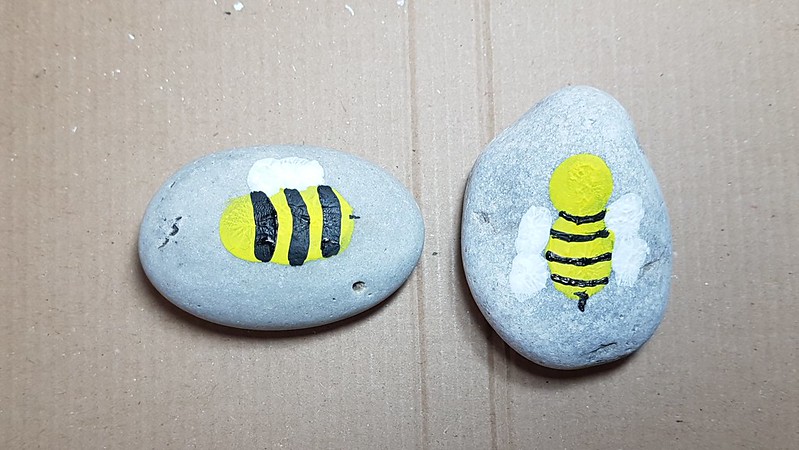 |
| Side facing bee - left Front facing bee - right |
- For the side facing bee, choose which end you want the face on and paint a curved line, leaving enough room for the face. Then paint more curved lines until you reach the end. Once at the end, add a little dab of paint for the stinger.

- For the front facing bee, add a little line under your bee's chin, then add further lines until you reach the end of his body, then add a little dab of paint for his stinger.
- Allow to dry or take care with the next step
6. Add some facial features.
7. Add a mouth and antennae.

9. Add some highlights.
- Using the wrong end of your paintbrush, dip it in some black paint and dot on some eyes.
7. Add a mouth and antennae.
8. Outline your bee (optional).
- Using a thin paintbrush dipped in black paint or a paint pen or Sharpie, outline your bee as shown below
9. Add some highlights.
- Using a very thin brush or a white paint pen, add a little white dot to each eye as a highlight
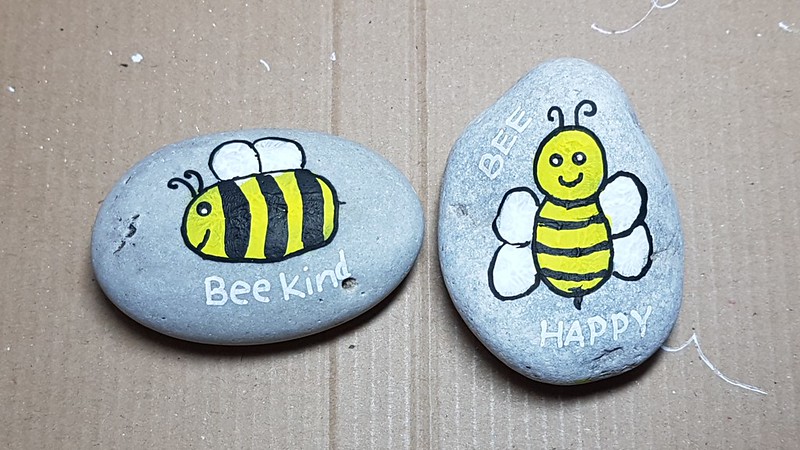
- You can also, at this stage, add some text
- Allow to dry
10. Add text on the reverse of your rock.
- For help with this, click here
- Allow to dry
11. Seal your rock.
- For help sealing your rock, click here.
- If you need help with what sealant to use, click here
If you need help creating and sharing rocks, here are some previous publications that can help you:
- Preparing and Painting Rocks
- Cool Places to Hide Your Rocks
- Not-So-Cool Places to Hide Your Rocks
- Basic Do's and Do Not's
- What to write on the back of your rock
Check out the FAQ and, if it's not there, ask on the Facebook group, we'll all be happy to help!
No comments:
Post a Comment
Note: only a member of this blog may post a comment.