

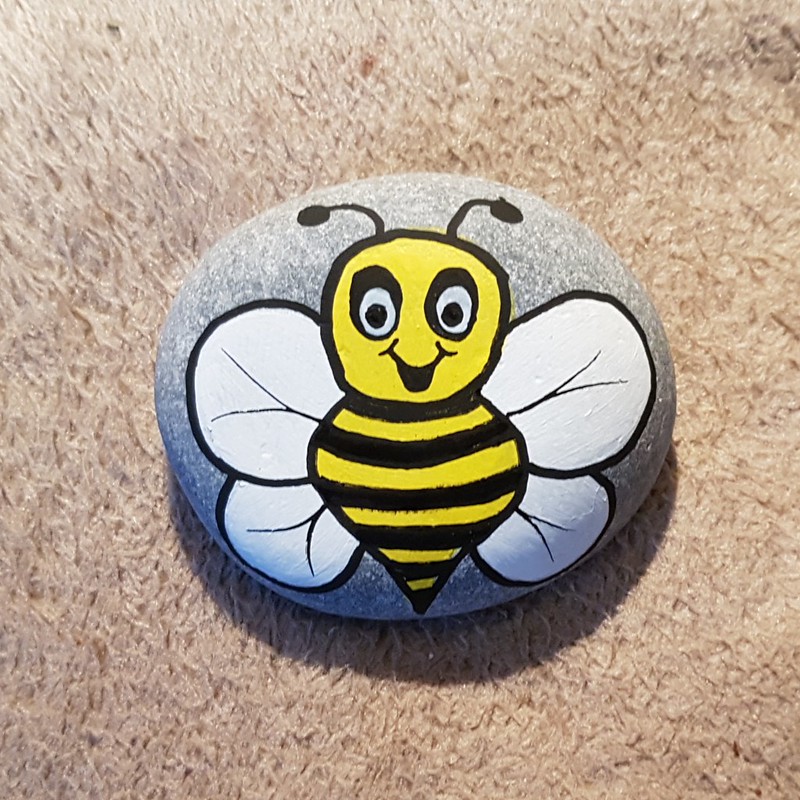
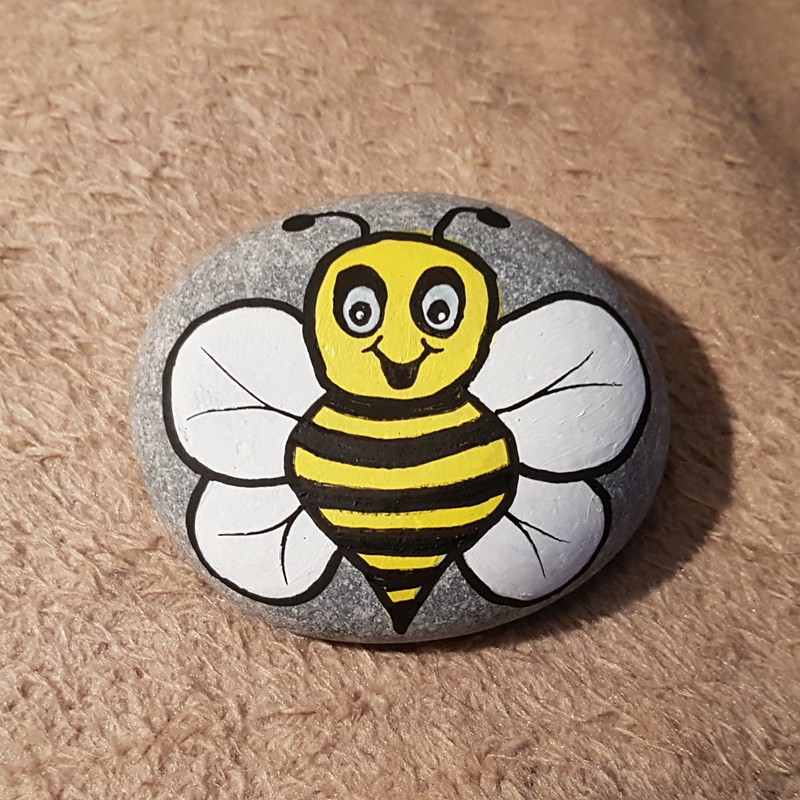
This little bumblebee is the third published within the last week, check out the Bumblebee index page on the Tutorial index
Here's what you'll need:
- Your chosen rock
- Acrylic paints
- Black
- Yellow
- White
- An old plate, a paper plate or paint pallet
- Paint pens or Sharpies (optional)
- Black for the outline and eyes (optional)
- White for the eye highlights (optional)
- A slim paint brush (optional)
- Warm, soapy water
- A sponge
In this tutorial, a white outliner pen has been used to make the lines easier to see, you can use a pencil if you wish.
Here's how it's done:
Here's how it's done:
1. Wash and dry your rock.
- For more details on how to paint and prepare your rock, click here
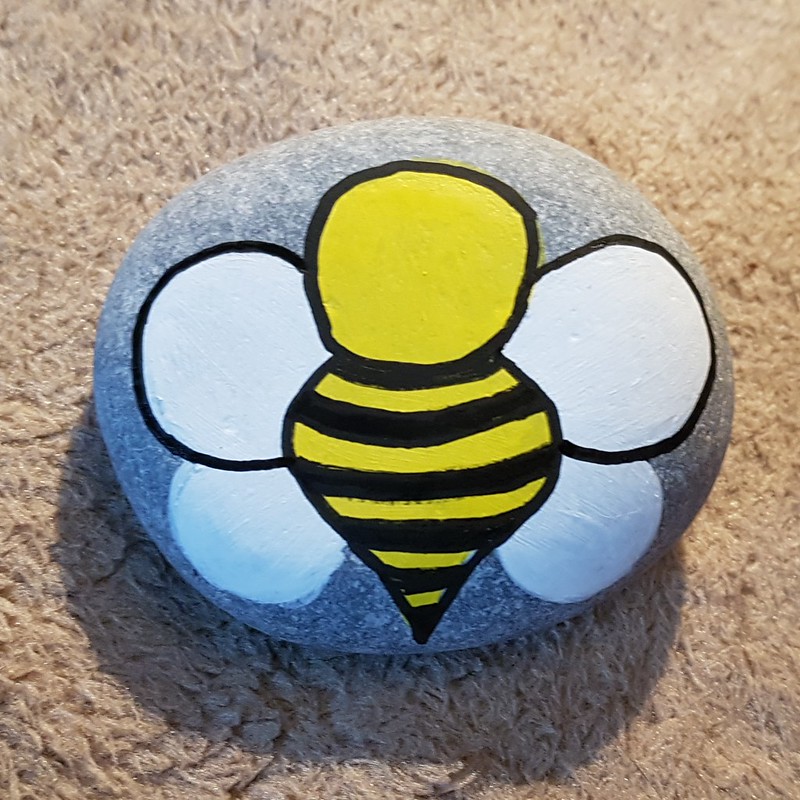
2. Start with a circle for the head.
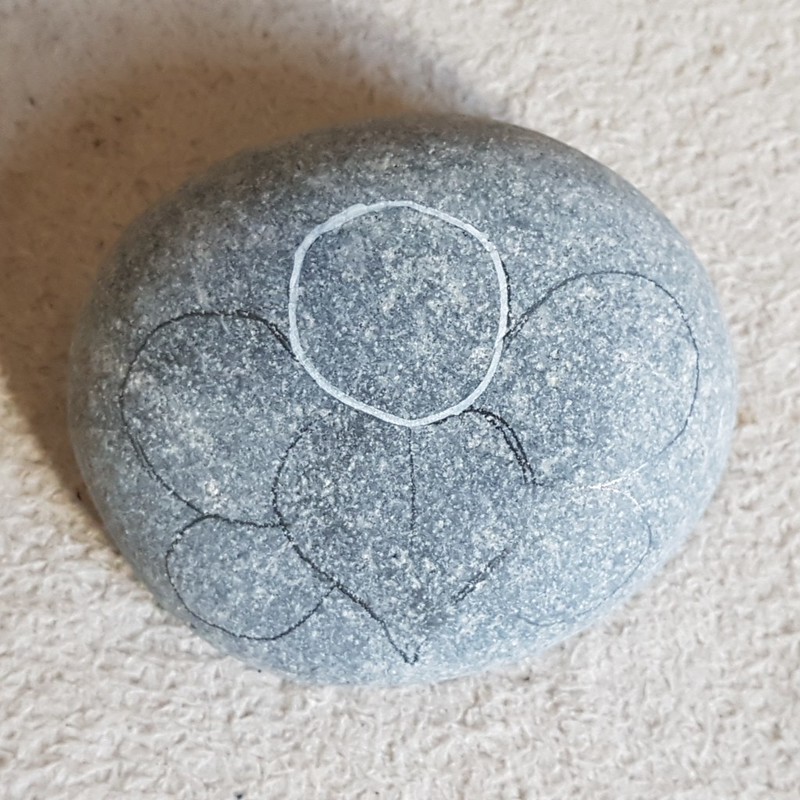
3. Now a love heart shape for the body. Don't forget to add the point at the bottom, this will be a stinger

4. Now for the wings.
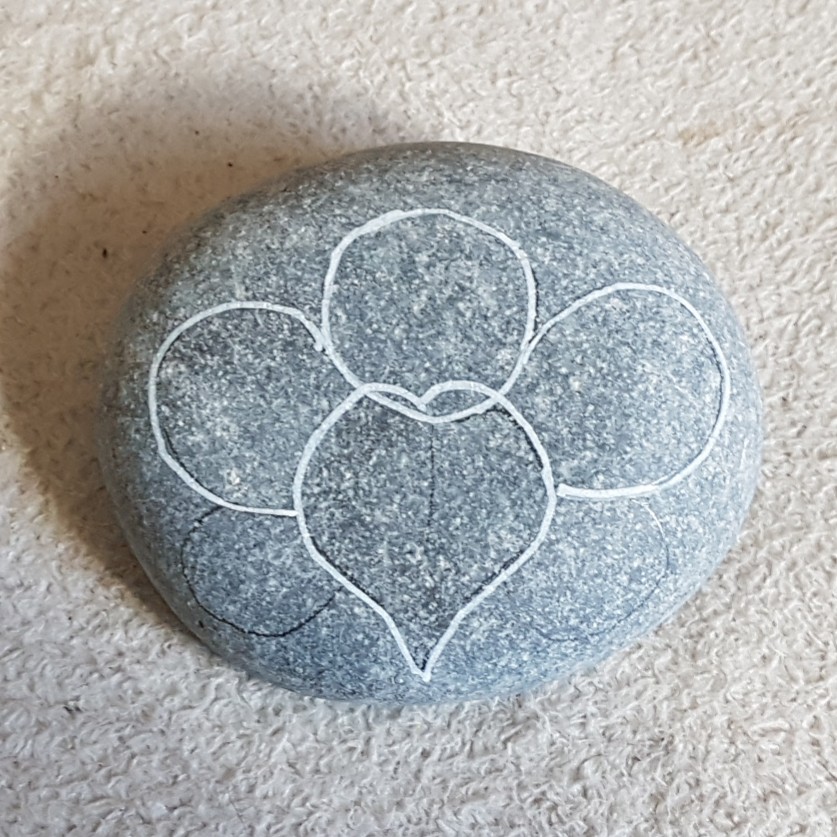


- Start with the top set first and add two circles.
- The add an additional pair at the bottom
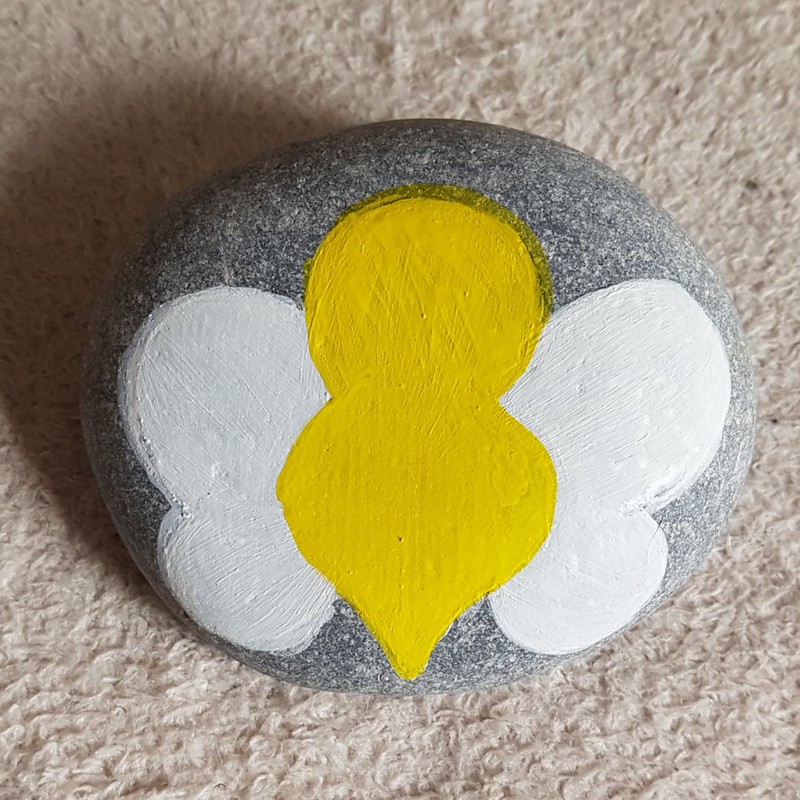
5. Give it an undercoat.
6. Fill in the head and body shape with yellow.
7. Time to start outlining
- Firstly, outline the head and the body, then
- Starting at the top, below his chin at his neck, add your first black stripe

- Next, add the rest of the stripes, all the way down to the stinger (the pointy bit at the bottom) and make sure that's in black.
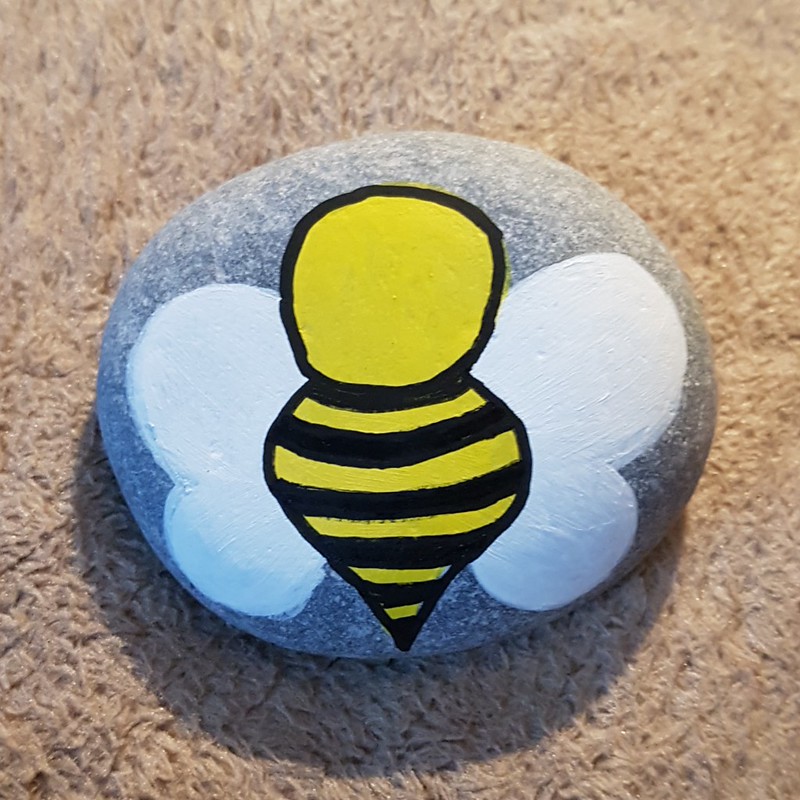
8. Outline the wings.
- Starting with the top pair of wings then
- The bottom pair

9. Time to add a little face
- Add two oval blobs for the eyes
- Add the cutest smile you can draw, it doesn't have to be like with one, a simpler 'U-shaped' mouth will be fine
- Allow drying time
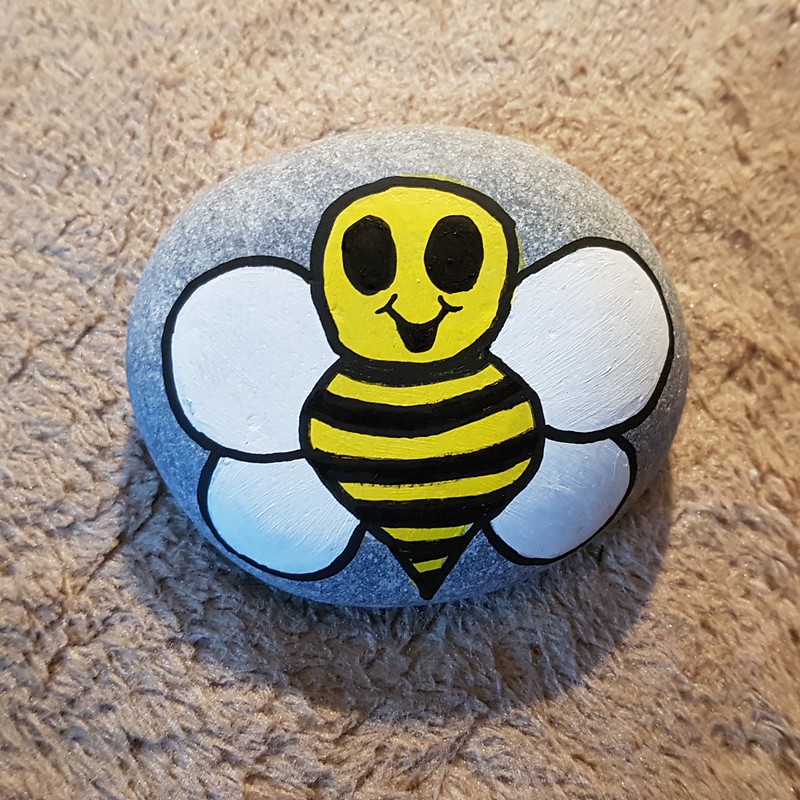
- Whilst the eyes are drying, add some little details to help him look even more amazing
- A pair of antennae on the top of his head
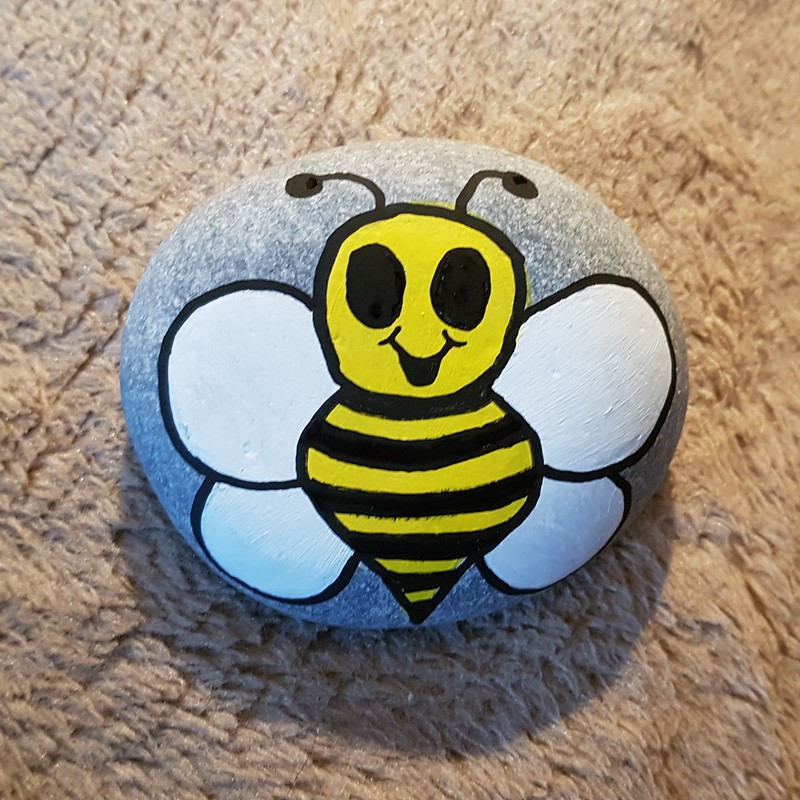
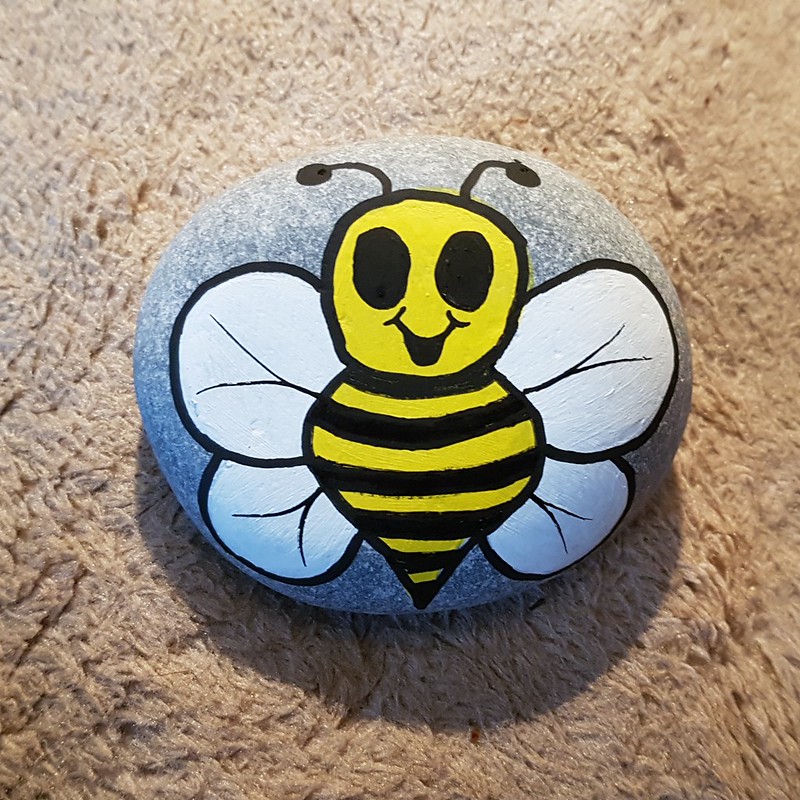
- And some little lines on his wings
- By now, the black of the eyes should be dry, so add a smaller white dot in the middle
- Allow to dry
- Once dry, add an even smaller black blob the bottom centre
- Once that is dry, add an even smaller white dot as a highlight to the eyes
12. Add text on the reverse of your rock
- If you need help with this, click here
- Allow to dry.
13. Seal your rock.
- For help sealing your rock, click here.
- If you need help with what sealant to use, click here
If you need help creating and sharing rocks, here are some previous publications that can help you:
- Preparing and Painting Rocks
- Cool Places to Hide Your Rocks
- Not-So-Cool Places to Hide Your Rocks
- Basic Do's and Do Not's
- What to write on the back of your rock
Check out the FAQ and, if it's not there, ask on the Facebook group, we'll all be happy to help!
No comments:
Post a Comment
Note: only a member of this blog may post a comment.